Encouraging all students to participate in lessons in order to elicit evidence of their achievement can be difficult. One method which involves a no-hands up policy is to employ the use of a random generator to randomly select students. Some studies have shown that this is beneficial in that it helps keep the attention of students as they are unsure whether they might be next and are more likely to maintain engagement in the lesson. There are various methods of doing this from the use of names in a hat or on ‘lolipop’ sticks drawn from a jar through to computer based solutions. The benefit of many of the ICT solutions is that they are very visual, names can easily be saved and updated and as many lessons involve the use of computer based presentations they can easily be integrated within the lesson.
Below is a collection of some of the different random name generators available, divided into 3 categories:
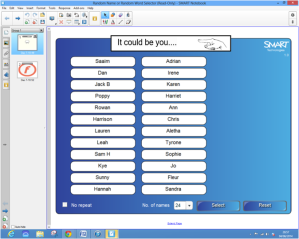
1. SMART notebook – there is a generator tool called the “random word chooser” which can be found in the Lesson Activity Toolkit.
2. Internet based options – a variety or web based, or downloadable tools
3. iPad based options – with the increased use of tablets in the classroom, there are various apps which allow you to select students at random, some of these are more sophisticated with options for recording formative assessment as well.
 SMART NOTEBOOK
This random selector is a flash generator embedded into a SMART notebook page – so easily saved for each of your classes – and can easily be embedded as part of your lesson if using a SMART notebook file.
For staff at St Ivo a copy of this has been saved in Projects_Staff_IWB Resources_Random name and group sorters. For other colleagues who might be reading this – you can search for the “random word chooser” of the Lesson Activity Toolkit.
(similar group sorter templates are available in the same folder on projects).
INTERNET BASED OPTIONS
 http://primaryschoolict.com/random-name-selector/
You can save the names as a URL (so could be saved as a shortcut in your projects area or on the desktop.
Simple and effective.
 Class Tools Random Name / Word Picker This can be either as a fruit machine or as a typewriter. Names can be saved. A simple but effective internet based option. This is widely used! Could also be used to good effect with key terms – students given a key term at random to define!
http://www.classtools.net/education-games-php/fruit_machine
Instant Classroom (Superteachertools.net) http://www.superteachertools.com/instantclassroom/random-name-generator.php
(this will also act as a ‘group’ sorting tool and allow you to show names on a desk for swapping round seating for different activities).
For this you create a group name and then add a password and add your email address.
Instant Fruit Machine – Random Selector
http://www.teach-ict.com/tools/picker3.php  This one acts a bit like a fruit machine – unlike the ones above it doesn’t allow you to save names – however it will allow you to simply copy and paste names in very quickly if you have a list in word format.
No Hands – Random Student Selector http://www.ehyde.com/No%20Hands/
This requires a download to your computer and it can take some time setting up your class lists. However these only need doing once!. You have to install this one on your computer and then Read the ‘Read Me’ File in order to follow instructions of what to do.
The benefit of this is it is quite discrete and will sit nicely in your toolbar for whenever you need it in a lesson so it enables you to use it as a randomiser for picking students whenever you want.
Random Name Generator (Excel)
http://www.teach-ict.com/teacher/utilities/Random%20Name%20Generator.xls
 Very user friendly as is in Excel – all groups can be created and saved in one spreadsheet – if you name each column with the name of the group – this will then appear in the drop down box for you to choose from!
(You do need to ensure macros are enabled for this to work).
Random Student Picker Tools
http://www.barryfunenglish.com/tools

This option includes a random student picker and a dartboard selector tool which can be used in a similar way. You need to sign in to access this tool – it can be accessed from the free trial section – so you do not have to sign up to a paid account.
OPTIONS ON THE iPAD (then use Airserver to project on the IWB)
 Name Selector Lite https://itunes.apple.com/gb/app/random-name-selector-lite/id589498393?mt=8 (Free) (there is also a paid for version which is add free for £1.99)
Simple and easy to use and you can easily turn students within a group off and on – for exactly which students you want to be included in any particular selection group.
 Stick Pick
https://itunes.apple.com/gb/app/stick-pick/id436682059?mt=8 £1.99
Random selection of a student’s name from a virtual can of lolipop sticks. Each stick is linked to a mode and level of difficulty for each learner (which can be set and saved) – every time a student stick is drawn – you are shown over a dozen Bloom’s taxonomy related questions – each will be at the individual ability level set for that student.
 iLeap Pick a student https://itunes.apple.com/gb/app/ileap-pick-a-student/id549617029?mt=8 (Free)
This app enables staff to pick students at random and supports multiple classes as well having a number of different options for choosing students. There is a turn based selection if wanted so that every student will be picked before any one will be selected again.
 Pick Me (£1.49) https://itunes.apple.com/gb/app/pick-me!/id444045099?mt=8
This tool will also help track formative assessment – will randomly pull student names and once question has been answered – you can record whether or not it was correct using the thumbs up or incorrect using thumbs down – data can be saved and sent to your email address.
Filed under: Apps, Assessment, Feedback, Ideas, Inspiration & Engagement, IWB, Uncategorized | Tagged: Assessment, Random Name Generator, Random Name selector, Teaching and Learning | Leave a comment »


 Natural Disasters: Earthquakes

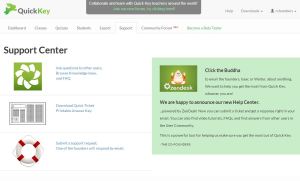
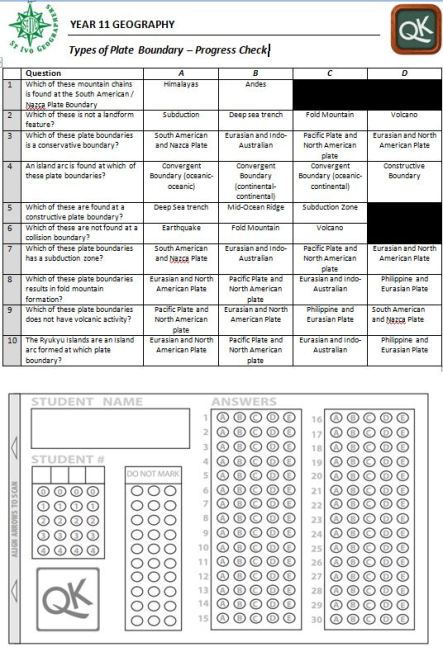
 Students simply fill the answers in on the ‘exit ticket’ which can be downloaded from the site. I have incorporated this into the base of our quiz sheets.
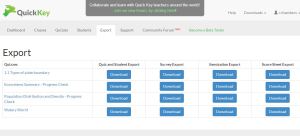 There are various options for exporting your results and you can also analyse your results e.g. by sorting according to mark (highest to lowest etc.)